

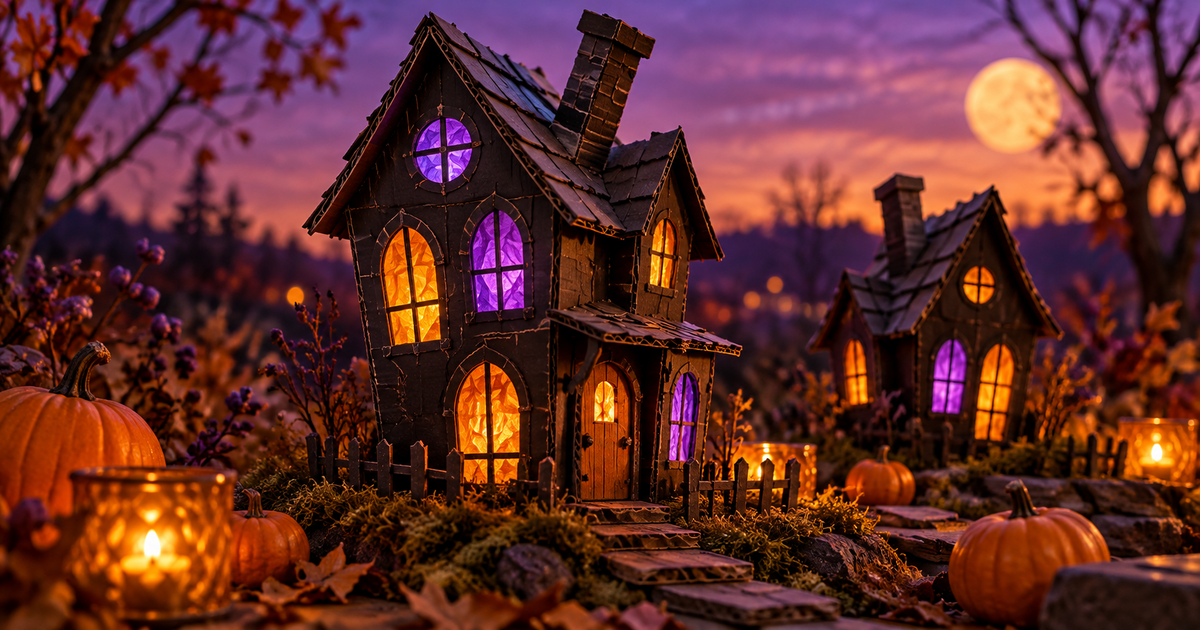
How to Make a Light-Up Cardboard Haunted House for Halloween
A cardboard haunted house is a tabletop Halloween craft made from cut cardboard walls, tissue-paper windows and a battery tea light inside. Family Handyman rates it a beginner project that takes 20 to 30 minutes and costs between $0 and $20, and Safari Ltd. adds a simple trick: glue two cardboard tubes to the back so each little house stands up on its own.
This is a project for a kitchen table, a mantel or the candy bowl, and it uses things you likely already have, plus a hot glue gun and a set of flickering flameless tea lights if you need them. It is a good fit for a small space, so see our small-space DIY props for more, and our budget haunt guide for bigger plans.
What do you need for a cardboard haunted house?
| Item | Used for | Notes |
|---|---|---|
| Cardboard | Walls, roof, towers | Family Handyman cuts uneven squares and rectangles on purpose for a creepy look |
| Purple or orange tissue paper | Glowing windows | Cut it slightly larger than each opening |
| Black paint | Contrast against lit windows | Safari Ltd. says to keep coats thin so the cardboard does not curl |
| Hot glue | Assembly | Both guides rely on it |
| Battery tea lights | Inside light | Flameless, so there is no fire risk |
| Craft knife or X-Acto, cutting mat | Windows and doors | Adult tool for kids’ projects |
| White paint pen | Window outlines, bricks, webs | Safari Ltd. uses this for details |
| Toilet paper tubes | Rear stands | Two per house |
How do you build it step by step?
- Cut the pieces. Family Handyman has you cut cardboard squares and rectangles in uneven sizes. Safari Ltd. draws a rectangle for the main structure, a triangle roof and a small chimney.
- Cut windows and doors. Sketch the openings and cut them out with a craft knife.
- Add tissue paper. Glue it behind each opening so the light diffuses.
- Assemble. Hot-glue the walls together, leaning into an off-kilter shape, then add a roof or towers with windows.
- Paint it. Apply dark paint, thinly, and let it dry flat.
- Add details. Use a white paint pen for window frames, bricks and spiderwebs.
- Make it stand. Glue two toilet paper tubes to the back sides, flush with the bottom and hidden from the front.
- Light it. Put a battery tea light inside and place it beside the candy bowl.
Safety note: a hot glue gun and craft knife are for adults or supervised older kids. Use only flameless lights inside paper and cardboard, never real candles.
How do you make it feel like a village?
Safari Ltd. makes several houses of different sizes and sets small zombie figures in front of them. Any small figures will do. Line the houses up with a few floating candles for a graveyard backdrop, or add a paper bat swarm above. Vary roof shapes and keep window placement uneven so the group looks like a haunted street rather than a row of boxes.
How long will it take and what will it cost?
Family Handyman estimates 20 to 30 minutes per house and a $0 to $20 budget, which presumes you use boxes you already have. Safari Ltd. gives no time or cost. Paint drying time adds to the clock, so paint first and do the rest later.
Frequently Asked Questions
What kind of cardboard works best? Neither source specifies a thickness. Any flat cardboard you can cut with a craft knife works; thin coats of paint help it stay flat, per Safari Ltd.
Is a cardboard haunted house safe with a light inside? Use a battery-powered tea light. Both sources light the house from the inside, and Family Handyman specifically lists battery tea lights.
Can kids make this? Family Handyman calls it a beginner project, and Safari Ltd. built it as a kid-friendly craft. An adult should do the knife cutting.
How do you make the house stand up? Glue two toilet paper tubes to the back sides.
What color tissue paper should you use? Family Handyman suggests purple or orange.
Want a bigger build? Start your first home haunt with this beginner guide.

As an Amazon Associate we may earn commission from qualifying purchases at no extra cost to you.
new in halloween animatronics
Lowe's cut 9 Haunted Living and Disney animatronics 30-55%. See which markdowns are the best value per foot, which to skip, and how to check price and stock.
Our honest Spirit Halloween Mr. Dark review: a black-robed skeleton that pops up to nearly nine feet on a scissor lift for $370.99. We score it 3.9 of 5.
Our honest Spirit Halloween Electrified Corpse review: a wire-wrapped torso that violently shakes and screams overhead for $149.99. We score it 3.4 of 5.
Find Haunted Houses in:
trending in haunt industry
Everything you need to know about East Coast Haunters Convention 2026 — dates, location, what to expect, haunt tours, seminars, and how to get tickets before prices increase.
HalloweenCostumes.com's 2026 Fan Design Program lets you design a real Halloween animatronic. Two winners get 10 props each plus 5% revenue. Submissions close April 30.
ShudderCon 2026 runs April 25–26 at Camp Jordan Arena in East Ridge, TN. Tickets from $15–$75. Here's the full preview for horror fans, haunt pros, and scare actors.