How to Set Up Your First Home Haunt in 2026: A Complete Beginner’s Guide
There’s a moment — usually around the third week of September — when people who have been casually decorating their front porch for Halloween decide they want more. They want an experience, not just decorations. They want the neighbors slowing down. They want kids approaching with genuine uncertainty about what comes next. That moment is the beginning of a home haunt. This guide is built for that moment: practical, sequential, and designed to get you from zero to functional haunt in 2026 without wasting money on the wrong gear or making layout decisions you’ll regret mid-season.
Step 1: Choose a Theme Before Buying Anything
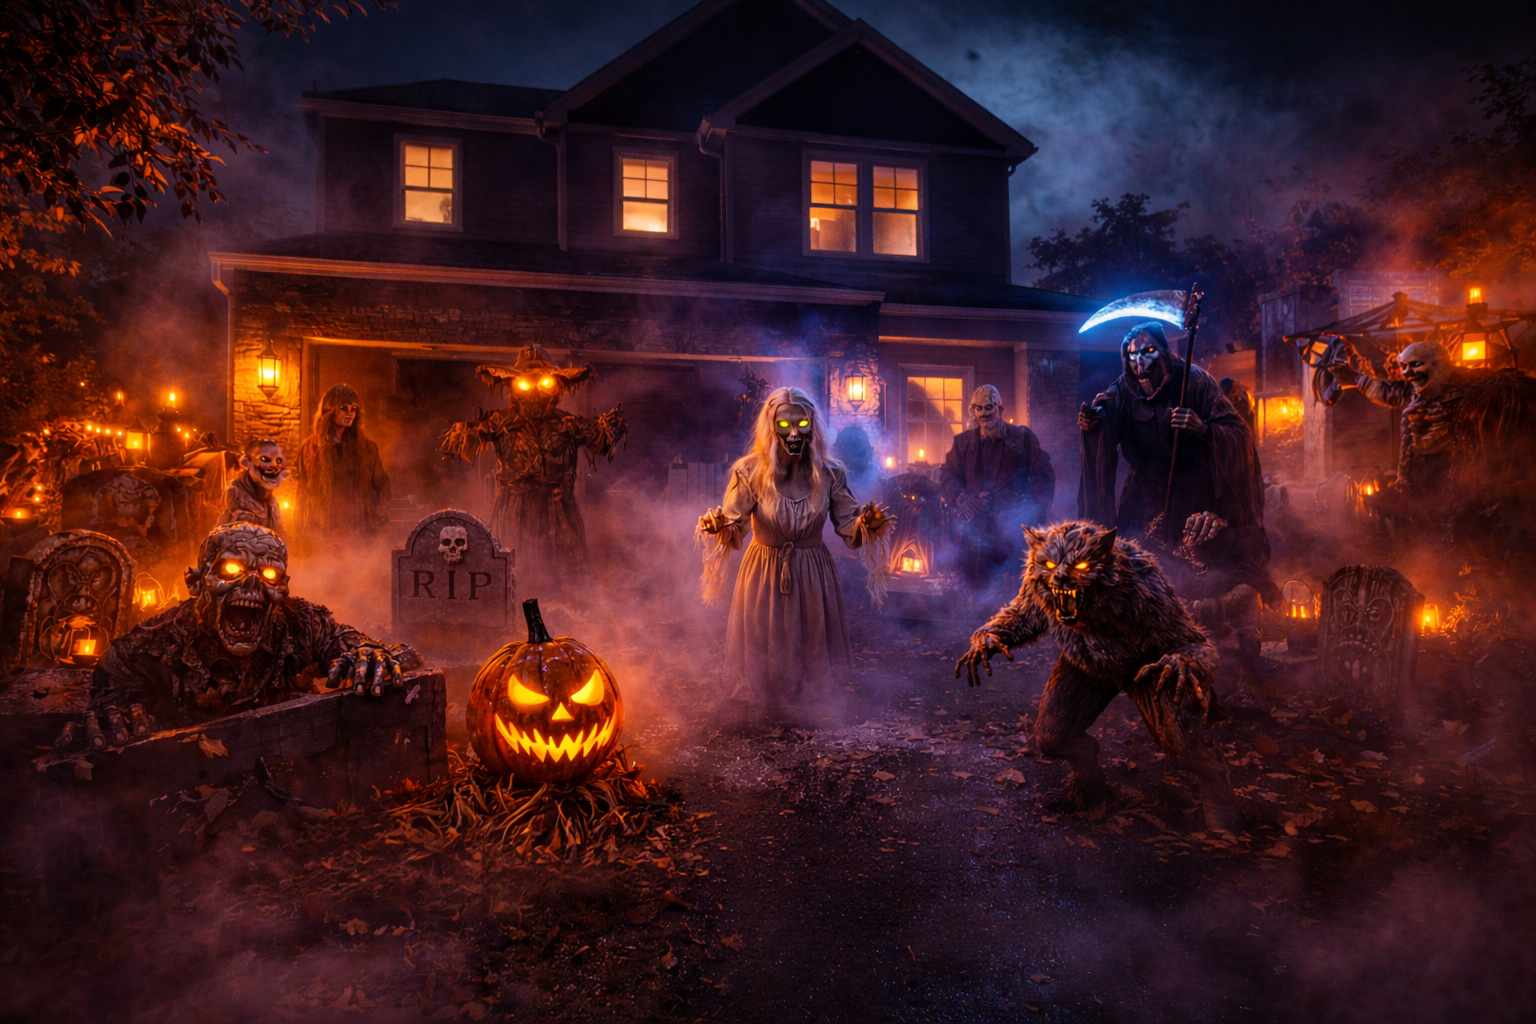
The single most common home haunt mistake is buying props before deciding on a theme. A random collection of skeletons, fog machines, and animatronics from different aesthetic worlds reads as “a pile of Halloween stuff” rather than a haunt. A themed haunt — even a simple one — feels intentional and immersive in a way that generic decoration never does. Common beginner themes that work well at small scale include:
- Classic Graveyard — Tombstones, ground-breakers, dead trees, fog, and a gatekeeper figure. Timeless, affordable, and readable in any lighting condition.
- Carnival of Horrors — Clowns, striped fabric, distorted mirrors, carnival music. Versatile across indoor and outdoor setups, and benefits strongly from color-filtered lighting.
- Witch’s Lair — Cauldrons, hanging herbs and bottles, spider webs, candle-style LED lighting. Excellent for front porch or garage setups with close-range visitor encounters.
- Apocalypse / Wasteland — Distressed surfaces, military or survival props, zombie figures. Works well in wide outdoor spaces and scales gracefully with budget.
Choose one theme and commit to it completely. Every prop, every lighting choice, every sound effect you add should serve the theme or it doesn’t belong in the setup this year.
Step 2: Map Your Space and Plan Guest Flow
Effective home haunts are built around a controlled guest path — a route visitors follow that you design, not one they choose. The difference between a decorated yard and a haunt is that in a haunt, you control what people see, in what order, and from what distance. A basic path structure that works at almost any scale:
- Approach zone — The path from street to your haunt’s entrance. Set atmosphere here: ground-breakers, pathway lighting, ambient audio. The goal is dread before the first scare.
- Entry point — A threshold moment that clearly signals “you are entering the haunt.” A lit archway, a hanging creature in a doorway, or a figure standing at the gate all work. Make the entry unmistakable.
- Build zone — The middle section where your theme deepens and tension builds. Put your mid-range props here. This is the longest zone in terms of the guest’s experience.
- Climax scare — Your best prop, your most effective actor position (if you use actors), or your highest-impact effect. This is the moment guests are still talking about on the drive home.
- Exit / cool-down — If you’re distributing candy or interacting post-scare, build in a clear exit route that releases guests from the haunt atmosphere gently.
Sketch this on paper before purchasing a single prop. The layout dictates how many props you actually need — many first-time haunters over-buy because they haven’t mapped the space.
Step 3: Prioritize These Three Investment Areas
Lighting (Highest ROI)
Nothing transforms a home haunt faster than well-placed, colored lighting. Darkness and shadows do more heavy lifting than any prop. Invest in: orange/amber flood lights for general atmosphere, purple or green accent spots for key props, and a few controllable LED strips to wash flat surfaces. Total budget for a strong lighting setup: $50–$80. The payoff is exponential — a $30 prop looks like a $200 prop in the right light.
Sound (Most Underrated)
Sound sells the haunt more than visuals. A looping ambient audio track — distant thunder, chains, screams, discordant carnival music, depending on your theme — is the single highest-leverage addition you can make to a setup that currently has none. Free or cheap Halloween audio tracks are available on YouTube and Spotify. A Bluetooth speaker in a weatherproof case or a cheap outdoor audio setup runs $30–$60. Set the volume so it’s clearly audible at the approach zone but not overwhelming at the entry point.
One Hero Prop (Centerpiece)
Every successful home haunt has one prop that carries the visual identity of the entire setup. In 2026, that might be a motion-triggered 8-foot figure, a large animatronic from Spirit Halloween or Home Depot, or a custom DIY centerpiece you’ve built around your theme. Budget $100–$200 for this. Everything else in the setup should frame and direct attention toward the hero prop. See our animatronics buying guide for specific recommendations at every price point.
Step 4: Build a Basic Prop Shopping List
| Item | Purpose | Budget Range | Where to Buy |
|---|---|---|---|
| Fog machine (400W) | Atmosphere, concealment | $35–$60 | Spirit Halloween, Amazon |
| Ground-breaker pair | Approach zone, path scare | $50–$80 | Spirit Halloween, Home Depot |
| Hero animatronic (theme-matched) | Centerpiece | $100–$200 | Spirit Halloween, Amazon |
| Colored flood lights (3-pack) | Atmospheric lighting | $25–$45 | Home Depot, Amazon |
| Bluetooth speaker (weatherproof) | Ambient sound | $30–$60 | Amazon |
| Tombstone set (foam) | Graveyard theme element | $20–$40 | Home Depot, Amazon, Spirit |
| Spider web / cotton stretch | Texture, depth | $10–$20 | Any party/Halloween store |
Step 5: Safety First, Always
Home haunts involve guests — often including children — navigating an unfamiliar path in reduced lighting. Safety decisions you need to make before your first visitors arrive: mark every step or grade change with glow tape or a subtle light source; ensure all extension cords are taped down or run under mats; keep walkways a minimum of 3 feet wide for groups; avoid open flames entirely (use LED candles and effects); and have at least one well-lit, clearly marked exit path that doesn’t require guests to reverse through the haunt. If you’re using live actors, brief them on how to create scares without physical contact. Check out our broader guide to home haunting and DIY for more detailed safety and setup resources.
Scaling Up Year Over Year
The smartest approach to home haunting is incremental investment. Build your first haunt at $200–$350 total, run it one season, identify what worked and what didn’t, and add one major upgrade the following year. Most experienced home haunters will tell you their haunt improved most dramatically between year one and year three — not because they spent more, but because they learned how their specific space, neighbor dynamic, and guest flow actually worked in practice. Document everything: photo your setup from the guest’s eye level, note which props triggered most reliably, and flag what you’d change. Your year-two haunt will be dramatically better for it.
Frequently Asked Questions
How much does a first home haunt cost to set up?
A functional, theme-coherent home haunt can be built for $150–$350 for a first year, including a fog machine, one centerpiece animatronic, basic lighting, and a sound system. More elaborate setups scale to $500–$1,000+, but diminishing returns kick in quickly — the basics, done well, outperform expensive props placed poorly.
Do I need a permit to run a home haunt?
For most residential home haunts that are free to visit and not ticketed, no permit is required. If you’re charging admission, using amplified sound past local noise ordinances, or running a large-scale setup that affects traffic or pedestrian flow, check with your local municipality. HOA rules may also restrict certain elements like large outdoor props, lighting, or sound systems — review those before investing.
What’s the most important thing to get right for a first home haunt?
Lighting. Proper darkness with well-placed color and shadow transforms average props into effective scares and ties your theme together visually. Most first-time haunters under-invest in lighting and over-invest in props, when the ratio should be roughly reversed in terms of attention and planning.
Should I use live actors in my home haunt?
Live actors are powerful but require briefing, reliability, and costumes. For a first-year haunt, focus on atmospheric props and design rather than live performance — you’ll have enough to manage with the physical setup. Year two or three, when your layout is locked in, is a better time to add actors effectively.
Ready to take the home haunt deeper? Explore Haunt Harvester’s Home Haunts and DIY section for advanced setup guides, prop reviews, and theme inspiration — or browse our animatronics hub to find the perfect centerpiece for your 2026 build.
Latest Video
haunt your inbox
Sign up for exclusive news, spooky updates, and more.