

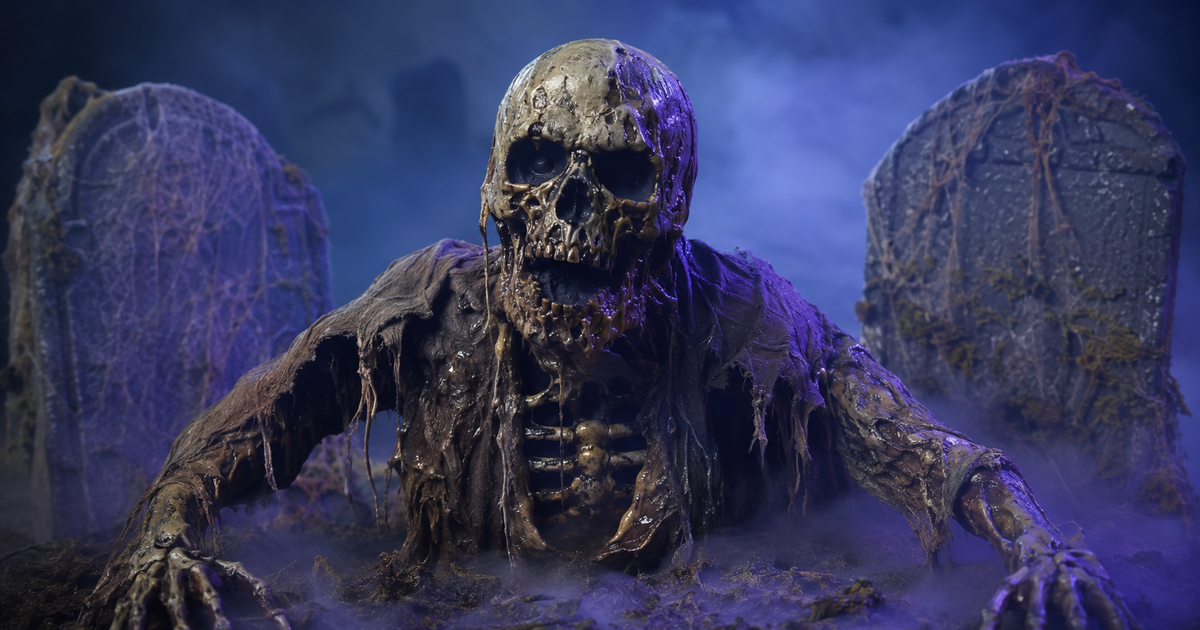
How to Corpse a Skeleton: Step-by-Step Guide to a Realistic Halloween Prop
Corpsing is the haunt-builder technique of melting thin plastic (like painter’s plastic or grocery bags) onto a cheap plastic skeleton with a heat gun, then painting it to look like rotting, mummified flesh. A basic corpse takes an afternoon and about $20 to $40 in materials on top of the skeleton. The heat step releases fumes, so it must be done outdoors or in a well-ventilated space with a respirator.
A dollar-store skeleton looks like a toy. The same skeleton, corpsed, looks like something that clawed its way out of the ground – and it is one of the highest-impact, lowest-cost upgrades in home haunting. “Corpsing” just means adding a skin of melted plastic and paint so the bones read as leathery, decayed remains. This guide walks through the classic heat-gun method step by step, plus a no-heat alternative, with the safety notes that actually matter.
Haunt Harvester is reader-supported. If you buy through links on this page we may earn a commission at no extra cost to you.
What You Need to Corpse a Skeleton
You can corpse almost any rigid plastic skeleton, from a $5 seasonal blucky to a poseable model. Costs below are rough estimates and vary by store and region – buy what you can find cheaply.
| Item | Estimated cost | Notes |
|---|---|---|
| Plastic skeleton | About $5 to $40 | Rigid plastic; poseable holds a scene better |
| Thin plastic (painter’s plastic drop cloth or plastic bags) | About $5 to $10 | Thinner melts smoother; 0.3 to 0.7 mil works well |
| Heat gun | About $20 to $30 | A hair dryer is not hot enough |
| Craft or masking tape | About $3 | Tacks plastic in place before melting |
| Acrylic craft paints (brown, black, tan, cream) | About $6 to $12 | For the wash-and-drybrush finish |
| Cheap chip brushes and a spray bottle | About $5 | For washes and blending |
| Respirator, gloves, safety glasses | About $15 to $30 | Non-negotiable for the heat step |
A no-heat version swaps the plastic and heat gun for cheesecloth and watered-down wood glue or liquid latex – covered near the end if you would rather skip the fumes.
How Do You Corpse a Skeleton Step by Step?
Work in stages and let each one dry. The whole build is forgiving – rot is supposed to look uneven.
Step 1 – Set up a safe workspace
Melting plastic gives off fumes, so this is an outdoor or garage-with-the-door-open job, never a closed room. Wear a respirator rated for fumes, safety glasses, and gloves, and keep a heat-safe surface under your work. Have the heat gun’s stand ready so you are never setting a hot tool on plastic. If it is windy, block the breeze so it does not push heat back at you.
Step 2 – Pose and prep the skeleton
Decide the pose first, because corpsing locks it in. Reaching out of the ground, slumped against a wall, or crawling all photograph well. If your skeleton is poseable, set the arms and head now. Wipe off any dust so the plastic and paint grip.
Step 3 – Wrap it in thin plastic
Cut the painter’s plastic or bags into strips and drape them loosely over the bones, tacking them down with small pieces of tape. Bunch and wrinkle the plastic on purpose – those folds become sinew, tendons, and torn skin once melted. Overlap strips along the arms, ribs, and jaw where decayed muscle would cling.
Step 4 – Melt the plastic with the heat gun
Keep the gun moving in slow passes several inches away, and watch the plastic shrink and pull tight against the bones. Do not hold it in one spot – overheating scorches the plastic and can warp the skeleton. Melt in small sections, letting the plastic grab the bone and form stringy, skin-like webs between the ribs and along the limbs. This is the step that does the magic, so go slow and build it up gradually.
Step 5 – Base coat and washes
Once everything is cool, brush on a base coat of flat brown or a grimy tan, getting paint into every crevice. While it is still wet, or as a second pass, hit it with a thinned black or dark-brown wash that settles into the recesses – that shadow in the low spots is what sells the depth of the rot. Let it dry between coats.
Step 6 – Drybrush and detail
Load a dry brush with a light cream or bone color, wipe most of it off on a rag, and lightly drag it across the raised edges – cheekbones, knuckles, ribs. This catches the highlights and makes the bones pop against the dark recesses. Add hints of sickly green or deep red in a few spots for variety if you want. Less is more; a mostly-earth-tone corpse looks more real than a colorful one.
How Do You Make the Corpse Look Even More Real?
The base build looks great on its own, but a few finishing touches push it further.
Lighting and placement
A corpse lives or dies by its lighting. A single low, cool-toned spotlight from below or the side rakes across the melted texture and throws shadows that flat overhead light kills. Tuck it into a shadowed corner, a fog bank, or partway out of a mound of dirt so viewers’ imaginations finish the job. Our guide to building a fog effect for your home haunt pairs perfectly with a corpsed figure.
Costuming and staging
Draping torn, tea-stained cloth or burlap over the shoulders and hips hides the seams where plastic meets bone and adds instant age. A corpse rising from a DIY cemetery scene reads far better than one standing alone on a lawn. If you are building a whole graveyard, plan the layout before you place figures.
Is There a No-Heat Way to Corpse a Skeleton?
Yes. If fumes or a heat gun are a dealbreaker, the cheesecloth method gets you most of the way there. Cut cheesecloth into strips, dip them in watered-down wood glue (or liquid latex if you are not sensitive to it), and drape and press them onto the skeleton, stretching and tearing to make ragged skin and hanging flesh. Let it dry fully – it stiffens as it cures – then paint with the same base-wash-drybrush sequence above. It is slower to dry but produces stringier, gauzy rot and skips the heat entirely. It is a great fit for first-time builders or indoor work, and it slots neatly into a budget home haunt build.
Frequently Asked Questions
What does corpsing a skeleton mean?
Corpsing is a home-haunt technique that adds a skin of melted plastic (or glue-soaked cheesecloth) and paint to a plain plastic skeleton so it looks like rotting, mummified remains instead of a clean toy.
How long does it take to corpse a skeleton?
A basic corpse takes an afternoon – roughly two to four hours of active work plus drying time between paint coats. The cheesecloth method needs longer to dry fully before painting.
Is corpsing a skeleton safe?
The heat-gun step melts plastic and releases fumes, so work outdoors or in a well-ventilated space, wear a respirator, safety glasses, and gloves, and keep the heat gun moving to avoid scorching. The no-heat cheesecloth method avoids the fumes.
What kind of skeleton is best for corpsing?
Any rigid plastic skeleton works, from a cheap seasonal one to a poseable model. Poseable skeletons hold a scene better because you can lock in a dramatic pose before you corpse it.
Can I corpse a skeleton without a heat gun?
Yes – use the cheesecloth method: drape strips soaked in watered-down wood glue or liquid latex over the bones, let them dry stiff, then paint. It skips the heat and fumes and gives a stringier, gauzy look.
Building out your whole yard this year? Start with our beginner’s home haunt guide, then add atmosphere with a DIY fog effect.

As an Amazon Associate we may earn commission from qualifying purchases at no extra cost to you.
new in halloween animatronics
Spirit Halloween's Willow Witch is a 5 ft 9 in 2026 animatronic at $299.99 with industry-first conversation-response tech that listens and replies in real time.
Home Depot's 8 ft Perilous Plant Monster animatronic (2026) is a $299 outdoor Wicked Woods giant. See what it does, where to buy it, and if it is worth it.
Our honest Spirit Halloween 6 Ft 8 In The Lantern Keeper review: a $255.99 glowing pumpkin sentinel that shushes you. We score this animatronic 3.7 of 5.
Find Haunted Houses in:
trending in haunt industry
Everything you need to know about East Coast Haunters Convention 2026 — dates, location, what to expect, haunt tours, seminars, and how to get tickets before prices increase.
HalloweenCostumes.com's 2026 Fan Design Program lets you design a real Halloween animatronic. Two winners get 10 props each plus 5% revenue. Submissions close April 30.
ShudderCon 2026 runs April 25–26 at Camp Jordan Arena in East Ridge, TN. Tickets from $15–$75. Here's the full preview for horror fans, haunt pros, and scare actors.