

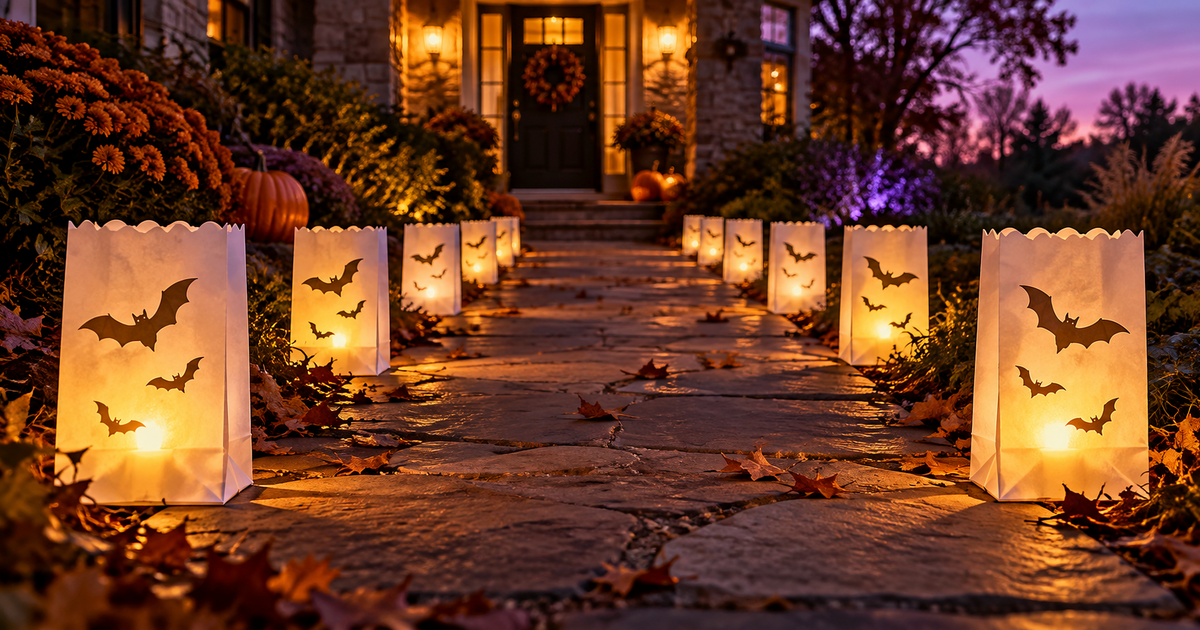
How to Make DIY Paper Bag Luminaries for Halloween
To make paper bag luminaries, cut a scalloped edge on white lunch sacks, add a cut-out design or stickers, put a handful of pebbles, rice or beans in the bottom and set a flameless LED tea light on top. Marie LeBaron’s Make: tutorial (October 21, 2009) specifies LED lights instead of open flames.
Paper bag luminaries are among the cheapest ways to line a walkway for Halloween, and a whole row costs little more than a pack of white lunch sacks and a set of flameless LED tea lights. Here is the method, plus our notes on rain and wind.
What do you need for Halloween luminaries?
| Item | Why you need it |
|---|---|
| Paper lunch sacks, preferably white | The lantern body |
| Razor blade and cutting mat | For cut-out designs (adult step) |
| Pencil and scissors (pinking shears optional) | Drawing the design and cutting the edge |
| Halloween stickers | No-blade option for kids |
| Pebbles, rice or dried beans | Weights so the bags stay put |
| Flameless LED tea lights | The light source |
How do you make paper bag luminaries step by step?
- Cut the top. Fold each sack in half at the top, then cut a crescent or zigzag pattern along the edge.
- Add a design (optional). Unfold the sack so the sides lie flat, pencil a design on the front, set it on a cutting mat and cut carefully with the razor blade. Unfolding keeps the cuts to the front and back only.
- Or use stickers. Stick them on both sides so the light shows through, the kid-friendly alternative from the tutorial.
- Weigh it down. Put a handful of pebbles, rice or beans in each sack so wind does not carry it off on Halloween night.
- Light it. Nestle an LED tea light in the weight.
What Halloween designs work well?
The source leaves the design up to you. Simple shapes read best through paper, so try a bat, a ghost or a pumpkin face. Line them along steps or a path, or set them among the headstones in our graveyard scene build and beside a gothic cemetery gate.
Safety and weather note: the tutorial recommends flameless LED tea lights, so there is no open flame near the paper. Take care with the razor blade and always cut on a mat. Paper is not weatherproof, which is our note: set luminaries out only on dry evenings and bring them in before rain. See our guide to keeping decorations from blowing away, and check our outdoor power safety guide before adding any plug-in lights.
Frequently Asked Questions
Can I use real candles? The tutorial uses flameless LED tea lights, and we recommend the same because of the paper.
What goes in the bottom of the bag? A handful of pebbles, rice or dried beans keeps it from blowing around.
Do I need a razor blade? No. Stickers on both sides are a no-blade option for younger crafters.
What color bags work best? The source prefers white sacks.
Will they survive rain? The source does not say. Paper bags can get soggy, so keep them dry.
Lighting more of the yard? Make floating candles for your porch.
As an Amazon Associate we may earn commission from qualifying purchases at no extra cost to you.
new in halloween animatronics
Buying a used or resold Halloween animatronic? Use this checklist to test motion, sound and sensors, judge a fair price and pay safely before you buy.
When is the best time to buy Halloween animatronics? Compare preseason launches, late-October markdowns, post-Halloween clearance and off-season buying to save.
Lowe's cut 9 Haunted Living and Disney animatronics 30-55%. See which markdowns are the best value per foot, which to skip, and how to check price and stock.
Find Haunted Houses in:
trending in haunt industry
Everything you need to know about East Coast Haunters Convention 2026 — dates, location, what to expect, haunt tours, seminars, and how to get tickets before prices increase.
HalloweenCostumes.com's 2026 Fan Design Program lets you design a real Halloween animatronic. Two winners get 10 props each plus 5% revenue. Submissions close April 30.
ShudderCon 2026 runs April 25–26 at Camp Jordan Arena in East Ridge, TN. Tickets from $15–$75. Here's the full preview for horror fans, haunt pros, and scare actors.