

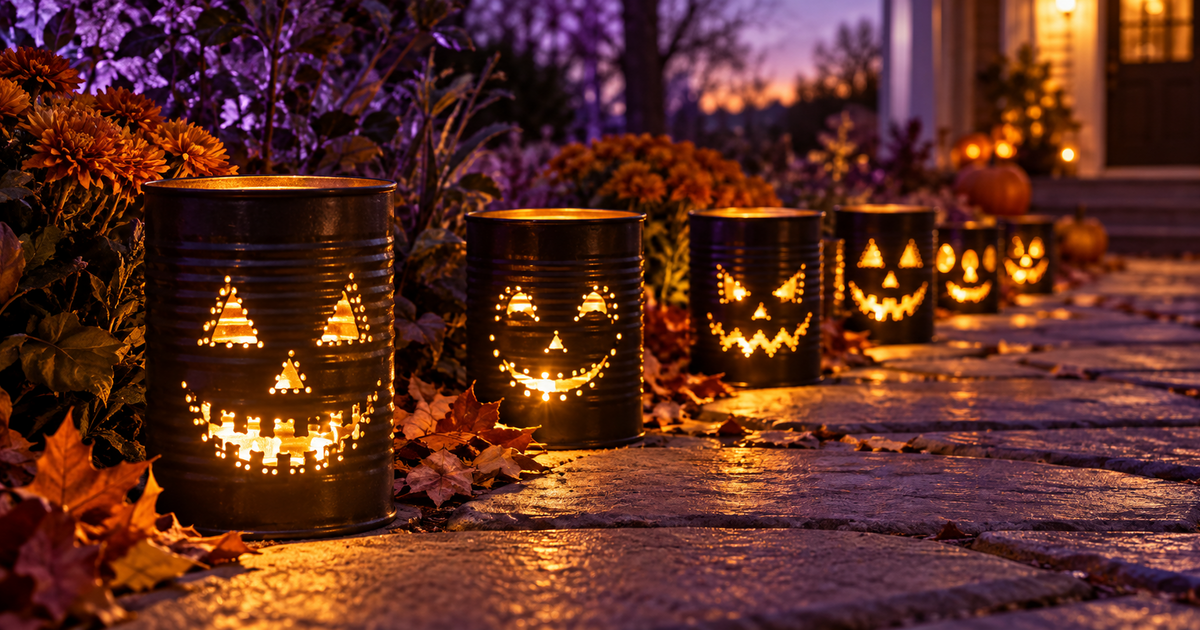
How to Make DIY Tin Can Jack-o’-Lantern Luminaries for Halloween
To make a tin can jack-o’-lantern luminary, fill a clean can with water and freeze it overnight, tap a face into the ice-filled can with an awl and rubber mallet, thaw it, spray it black and paint the inside of the face gold. Skip To My Lou’s version uses votive candles; we recommend flameless LED lights instead.
Tin can luminaries throw a warm, flickering jack-o’-lantern glow without carving a single pumpkin, and they last all season. Grab a large can, an awl, a rubber mallet and a few flameless LED tea lights and line them along your steps or walkway. The method comes from Heidi of Honeybear Lane, shared by Cindy Hopper at Skip To My Lou on October 19, 2013.
What do you need for tin can luminaries?
| Item | Why you need it |
|---|---|
| Large tin cans (coffee cans or big canned-food cans) | The lantern body |
| Permanent marker | Draws the face |
| Rubber mallet and awl | Punches the holes |
| Black spray paint | Coats the outside |
| Gold foil or acrylic paint | Lines the inside of the face |
| Flameless LED tea lights | Our light pick; the source uses votive candles |
How do you make a tin can jack-o’-lantern step by step?
- Prep the can. Peel off the label, wash it, fill it nearly to the top with water and freeze it overnight. The source says the ice makes hammering the holes “very easy.”
- Draw the face. Sketch a jack-o’-lantern face with the marker.
- Punch the holes. Tap small holes along the lines with the awl and mallet. Use light taps, because hitting too hard makes the holes too big.
- Thaw and dry. Run hot water over the can to melt the ice, then dry it.
- Paint. Spray the outside black, then paint the inside of the eyes, nose and mouth gold, keeping the lines clean along the holes.
- Add light. Drop in a light and turn off the room lights to see the glow.
Should you use candles or LED lights?
| Option | Pros | Cons |
|---|---|---|
| Votive candles | Used in the original tutorial; real flicker | Open flame near paint, porches and trick-or-treaters; the source gives no fire guidance |
| Flameless LED tea lights | No flame, safe on steps, battery powered | Less heat; check that the can is big enough |
The source does not mention battery alternatives or fire precautions, so the LED recommendation is ours. Schlage’s porch roundup also suggests battery votives in tin-can luminaries for extra safety.
Safety note (ours): punched metal can leave sharp edges. Wear gloves, check each hole and press or file down any burrs before handling. Keep cans away from dry leaves and plug-in cords, and read our outdoor power safety guide if you add plug-in lights.
Where do tin can luminaries look best?
Line them up a walkway, group them on porch steps or set them inside a graveyard scene beside a gothic cemetery gate. They pair well with floating candles for a layered, flickering look, and fit neatly into a budget haunt.
Frequently Asked Questions
Why freeze the can? The ice keeps the metal from denting and makes punching the holes much easier, per Skip To My Lou.
What size can works best? The tutorial uses large cans such as coffee cans or Costco-size canned goods.
How long does it take? The source gives no total time; the only timed step is freezing overnight.
Do I have to paint the inside gold? The tutorial paints the face openings gold for a brighter glow; regular acrylic also works.
Are LED lights okay? Yes, and we recommend them over open flame.
Keep building! Build a graveyard scene to show off your lanterns.

As an Amazon Associate we may earn commission from qualifying purchases at no extra cost to you.
new in halloween animatronics
Lowe's cut 9 Haunted Living and Disney animatronics 30-55%. See which markdowns are the best value per foot, which to skip, and how to check price and stock.
Our honest Spirit Halloween Mr. Dark review: a black-robed skeleton that pops up to nearly nine feet on a scissor lift for $370.99. We score it 3.9 of 5.
Our honest Spirit Halloween Electrified Corpse review: a wire-wrapped torso that violently shakes and screams overhead for $149.99. We score it 3.4 of 5.
Find Haunted Houses in:
trending in haunt industry
Everything you need to know about East Coast Haunters Convention 2026 — dates, location, what to expect, haunt tours, seminars, and how to get tickets before prices increase.
HalloweenCostumes.com's 2026 Fan Design Program lets you design a real Halloween animatronic. Two winners get 10 props each plus 5% revenue. Submissions close April 30.
ShudderCon 2026 runs April 25–26 at Camp Jordan Arena in East Ridge, TN. Tickets from $15–$75. Here's the full preview for horror fans, haunt pros, and scare actors.