

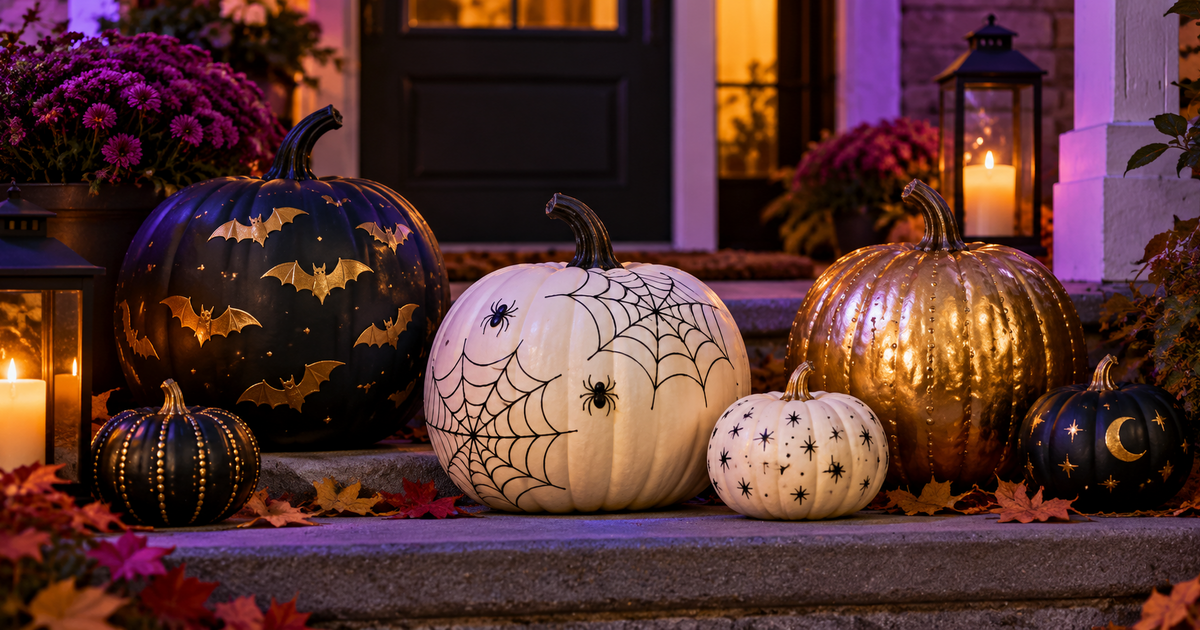
How to Decorate No-Carve Pumpkins for Halloween: Paint, Glue and Markers
To decorate a no-carve pumpkin, paint a solid base coat (white first makes designs pop), let each coat dry, then add your design with paint, markers, glued-on felt, tissue paper, ribbon or map tacks. Tom’s Guide says no-carve pumpkins are mess-free, kid-friendly and “will last a lot longer than just Halloween.”
Skipping the knife saves time, avoids the slimy mess and lets kids join in. Start with a clean, dry pumpkin, a coat of white spray paint or craft paint, and a hot glue gun for anything you want to attach. Thirteen ideas below come from Cynthia Lawrence’s Tom’s Guide tutorial (last updated October 25, 2022).
What do you need to decorate a pumpkin without carving?
| Item | Used for |
|---|---|
| Chalk or craft paint | Base coats and designs |
| Metallic spray paint | Gold, silver or copper pumpkins |
| Permanent markers | Faces, spider webs and details |
| Map tacks | Pushed into a painted surface for texture |
| Black felt | Cut-out eyes, nose and mouth |
| Glitter and craft glue | Glitter stems and attaching ribbon or leaves |
What are the best no-carve pumpkin ideas?
| Idea | How it works |
|---|---|
| Spooky bats | Paint sections black, then paint bats in the orange areas, or glue on bat templates |
| Pumpkin people | Draw faces with markers |
| Spider webs | Paint a solid color, then draw white or contrasting webs that follow the ridges |
| White ghouls | White base, then ghouls, temporary tattoos or transfers |
| Map-tack pumpkin | Paint a solid color, let it dry, then push in tacks |
| Metallic spray | Cover the table, spray the whole pumpkin, dry it in a cool place and repeat on patchy spots |
| Tissue paper | Cut shapes and glue them on |
| Day of the Dead | Paint a skull-style face and attach fake roses to the top |
| Glitter stem | Paint a base, glue the stem, then dip it in glitter |
| Ribbon wrap | Cut ribbon to the pumpkin’s width and tack it on with a few drops of craft glue |
| Fall foliage | Attach leaves, dried flowers or foliage |
| Felt face | Glue on black felt eyes, nose and mouth |
| Stencils | Trace a design, then paint it |
How do you get a clean finish?
- Protect the table. Use paper towels or an old sheet, especially for spray paint.
- Prime in white. A white base gives the colors a solid backdrop, per Tom’s Guide.
- Let it dry. Wait for each coat before the next.
- Follow the ridges. Use the pumpkin’s natural lines as guides for webs and stripes.
- Add details last. Glue, tacks, glitter and ribbon go on once the paint is dry.
Group painted pumpkins by your porch with ideas from our DIY Halloween ideas roundup, or draw spider webs in the style of our realistic spider webs guide. On a tight budget, see the budget home haunt build guide.
Safety and care note (ours): the source gives no drying times or lifespan, so check that paint and glue are dry to the touch before moving pumpkins, and use spray paint outdoors or in a ventilated space. Keep a hot glue gun away from children, and heavy pumpkins should be tied down or set low in wind, as in our guide to keeping decorations from blowing away.
Frequently Asked Questions
What paint works on pumpkins? Tom’s Guide lists chalk or craft paint for base coats and metallic spray paint for a full-coverage finish.
Do no-carve pumpkins last longer? The source says they “will last a lot longer than just Halloween,” but gives no specific number of days.
Is it safe for kids? The source calls the project fun and safe with children and free of carving mess. Supervise glue guns and spray paint.
How do I make designs stand out? Paint the pumpkin white first, and let each coat dry before adding the next.
Can I use a template? Yes. The tutorial suggests bat or ghost templates if you do not want to draw freehand.
Need more decor ideas? Browse DIY Halloween ideas for your porch and yard.
As an Amazon Associate we may earn commission from qualifying purchases at no extra cost to you.
new in halloween animatronics
Buying a used or resold Halloween animatronic? Use this checklist to test motion, sound and sensors, judge a fair price and pay safely before you buy.
When is the best time to buy Halloween animatronics? Compare preseason launches, late-October markdowns, post-Halloween clearance and off-season buying to save.
Lowe's cut 9 Haunted Living and Disney animatronics 30-55%. See which markdowns are the best value per foot, which to skip, and how to check price and stock.
Find Haunted Houses in:
trending in haunt industry
Everything you need to know about East Coast Haunters Convention 2026 — dates, location, what to expect, haunt tours, seminars, and how to get tickets before prices increase.
HalloweenCostumes.com's 2026 Fan Design Program lets you design a real Halloween animatronic. Two winners get 10 props each plus 5% revenue. Submissions close April 30.
ShudderCon 2026 runs April 25–26 at Camp Jordan Arena in East Ridge, TN. Tickets from $15–$75. Here's the full preview for horror fans, haunt pros, and scare actors.