

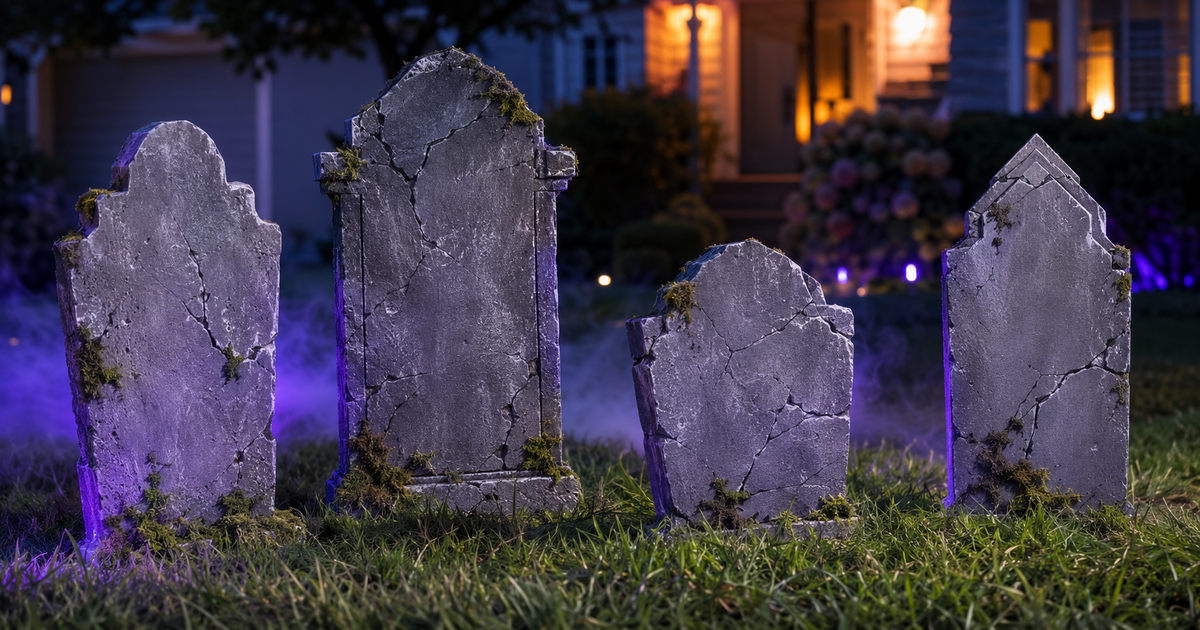
How to Make DIY Foam Tombstones for Your Yard Haunt (Step-by-Step)
To make DIY foam tombstones, cut shapes from rigid foam board or recycled packing foam, carve names and cracks with a knife or a hot tool, seal and paint the foam in gray stone tones with a darker wash in the crevices, then anchor each stone to the ground with wooden stakes. A basic tombstone takes an afternoon and costs about $5 to $15 in materials, and a whole graveyard can come together in a weekend.
Foam tombstones are the backbone of almost every home graveyard because they are cheap, lightweight, and look shockingly real once they are painted and aged. Rigid insulation foam or even the packing foam from a big appliance box will work. This guide covers the materials, the cutting and carving, the paint tricks that sell the illusion, and how to keep your stones standing through wind and weather.
What Materials Do You Need to Make Foam Tombstones?
Everything here is available at a hardware or craft store, and most of it stores flat for next year. The single most important choice is the foam: rigid extruded polystyrene insulation board (the pink or blue panels) carves cleanly and holds detail, while the white bead-board and packing foam is free but crumbles more.
| Item | Estimated Cost | Where to Buy |
|---|---|---|
| Rigid foam board, 1 to 2 inches thick (or recycled packing foam) | $0 to $20 per panel | Home Depot, Lowe’s |
| Craft knife, hand saw, or hot wire foam cutter | $5 to $25 | Craft store, Amazon |
| Cheap acrylic or interior flat paint (gray, black, brown) | $3 to $10 | Craft store, hardware store |
| Foam-safe primer or a coat of watered-down glue | $5 to $12 | Craft store, hardware store |
| Wooden stakes, dowels, or bamboo skewers | $3 to $8 | Garden center, hardware store |
One warning that saves a lot of grief: many regular spray paints contain solvents that eat bare polystyrene and leave a melted, pitted surface. Either use a spray paint labeled foam-safe, seal the foam first with a primer or a glue-and-water coat, or stick to brush-applied acrylics. Always test on a scrap corner before you commit.
How Do You Cut and Shape Foam Tombstones?
Work outdoors or over a drop cloth, because cutting foam makes a mess of static-clingy crumbs. Sketch your shape on the panel first with a marker so you commit to a clean outline before any blade touches it.
Step 1: Cut the base shape
Draw your outline: a classic rounded-top headstone, a stepped Gothic cross, a leaning slab, or an ornate scalloped top. Cut along the line with a craft knife (score and snap for thin foam), a hand saw, or a hot wire cutter for the smoothest edge. Vary the heights and widths across your set so the graveyard looks old and settled rather than mass-produced.
Step 2: Bevel the edges
Real stone is not razor-edged. Drag your knife at an angle around the front edges, or sand them down, to round and chamfer them slightly. This single step does more to sell the “carved rock” look than almost anything else, because it kills the flat foam-board silhouette.
Step 3: Carve names, dates, and cracks
Press lettering in with a dull pencil, a nail, or the back of a knife, then deepen it. Classic joke epitaphs (think “R.I.P.,” “Barry D. Alive,” “Ima Goner”) read from the sidewalk and add character. Gouge a few cracks and chips, and poke shallow pockmarks with a wire brush or the tip of a screwdriver so the surface looks eroded.
How Do You Paint Foam Tombstones to Look Like Stone?
Paint is where a foam cutout becomes a headstone. The goal is a stone base color with grime pushed into every recess and highlights dry-brushed onto the raised areas, so the texture reads from across the yard.
- Seal first. If you are using any spray, prime the foam or brush on a watered-down glue coat so the solvents cannot melt it.
- Base coat. Cover the whole stone in a flat medium gray. A stone-texture spray, if it is foam-safe, adds instant grit.
- Dark wash. Brush a watered-down black or brown (roughly two parts water to one part paint) over the stone and wipe the high spots, letting the dark settle into the letters and cracks.
- Dry-brush highlights. Lightly drag a nearly-dry brush of light gray or off-white across the raised edges and texture to catch the “wear.”
- Green touches. A whisper of green or moss color in the low corners suggests age and damp.
Let each coat dry fully; rushing the wash muddies the whole thing. Once your stones are done, low fog drifting between them is the cheapest upgrade in the graveyard, and our fog effect guide shows how to keep it hugging the ground.
How Do You Keep Foam Tombstones From Blowing Away?
Foam is light, so a stiff breeze will send an unanchored tombstone tumbling down the block. Drive two wooden stakes, dowels, or long bamboo skewers up into the bottom edge of the foam and then into the ground, angling them slightly apart for a wider, wind-resistant footing. On hard ground or pavement, weight the base with a hidden brick, a sandbag, or a bag of rocks tucked behind the stone.
The foam itself shrugs off rain, but water can seep into unsealed cuts and paint can lift over a long wet stretch, so a clear matte sealer coat helps stones survive the whole season. Store them flat and dry in the off-season and a good set will last for many Halloweens. A cemetery is one of the easiest big-impact scenes for a first-year yard; if you are just starting out, our beginner’s home haunt guide shows how a few props build into a full display.
Ideas to Build Out the Graveyard
Once you have a handful of stones, the scene grows fast. Cluster them at uneven angles and depths so they look like they have sunk over decades rather than lined up yesterday. Add a mound of dark mulch, a leaning shovel, and a few skeletal hands reaching up from the dirt. Frame the whole plot with a DIY cemetery gate so guests pass through an entrance on the way to the door, and uplight the tallest stones from below for long, reaching shadows.
Frequently Asked Questions
What is the best foam for DIY tombstones? Rigid extruded polystyrene insulation board (the pink or blue panels) is the favorite because it carves cleanly and holds detail. Recycled white packing foam is free and works, but it crumbles more and takes paint less evenly.
How much does it cost to make a foam tombstone? Most people spend about $5 to $15 per stone, and far less if you use recycled foam and paint you already own. One insulation panel makes several tombstones.
Can you use regular spray paint on foam? Not safely on bare polystyrene. Many spray paints melt it. Seal the foam with primer or a glue-and-water coat first, use a foam-safe spray, or brush on acrylics instead. Always test on a scrap.
How do you keep foam tombstones from blowing over? Drive wooden stakes or dowels up into the base and into the ground, angled slightly apart, and weight the base with a hidden brick or sandbag on hard surfaces.
Will foam tombstones survive rain? The foam handles rain, but seal your cuts and paint with a clear matte coat so water does not lift the finish. Stored flat and dry off-season, a set lasts many years.
Building your first yard haunt this year? Start your home haunt plan

As an Amazon Associate we may earn commission from qualifying purchases at no extra cost to you.
new in halloween animatronics
Spirit Halloween's Willow Witch is a 5 ft 9 in 2026 animatronic at $299.99 with industry-first conversation-response tech that listens and replies in real time.
Home Depot's 8 ft Perilous Plant Monster animatronic (2026) is a $299 outdoor Wicked Woods giant. See what it does, where to buy it, and if it is worth it.
Our honest Spirit Halloween 6 Ft 8 In The Lantern Keeper review: a $255.99 glowing pumpkin sentinel that shushes you. We score this animatronic 3.7 of 5.
Find Haunted Houses in:
trending in haunt industry
Everything you need to know about East Coast Haunters Convention 2026 — dates, location, what to expect, haunt tours, seminars, and how to get tickets before prices increase.
HalloweenCostumes.com's 2026 Fan Design Program lets you design a real Halloween animatronic. Two winners get 10 props each plus 5% revenue. Submissions close April 30.
ShudderCon 2026 runs April 25–26 at Camp Jordan Arena in East Ridge, TN. Tickets from $15–$75. Here's the full preview for horror fans, haunt pros, and scare actors.